Project H-10-K Enterprises Gateway Station

GWS Update

Express utility panel. There are slight differences from those found on ISS.
1. Square base mounting plates on the QDs,
2. Dust caps on all, but no lanyards. Still working on those
3. Different switch guards
4. Round cornered group graphics

See also attached lower utility panel texture
 

Attachments

  • Express_Lower.jpg
    Express_Lower.jpg
    72 KB · Views: 11
  • Express UIP.png
    Express UIP.png
    471.9 KB · Views: 22
Last edited:
GWS Update

The beginnings of a VC, an express rack comes together.
 

Attachments

  • Express_3.jpg
    Express_3.jpg
    133.1 KB · Views: 23
  • Express_4.jpg
    Express_4.jpg
    179.4 KB · Views: 33
I've decided to go with an MFD to handle the docking and berthing functions. There are too many variables to control all the functions via analog controls.
 

Attachments

  • MFD.png
    MFD.png
    137.8 KB · Views: 28
How do you get that much detail? (I'm talking about the labels, knobs, and switches)

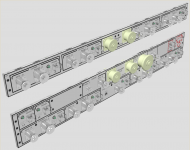
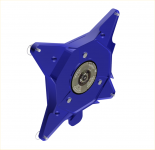
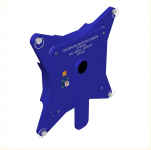
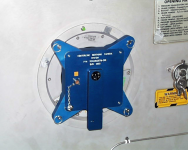
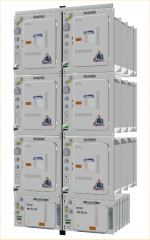
I take the time to make them as accuratly as possible in a scaled-up size, once finished, I scale the item back to 1:1, insert it into the the next higher assembly, and so on, and viola a few things become many things, and then you have a VC, or a module, or some other major assembly. It took several weeks to complete the CBM endcap, and hatch.

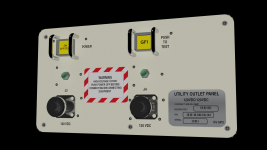
Alot of things need thier own textures, a button for example, may have text on it. If it's a MFD then text goes on the screen, but on the HTV HCP, you have to make a texture for each different button. I make these in Adobe Illustrator at full scale. Save them in 300-600 DPI format no larger than 2048 x 2048.

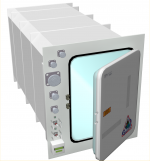
I start with the flatest thing, (the control surface) and build a texture that lacks detail(3D objects) make sure it's 2048 x 2048 in size to start with and detail becomes inherent, then add each 3D item to increase the detail. Buttons, guards, dial knobs, indicator lamps... then you get what Donamy, myself and many others have completed on a massive scale. A complete full up 3D object.

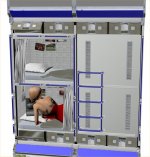
The biggest problem is frame rate, it tends to deteriorate with each increase in detail level. Welding, optimizing, singularizing and the like bring it back into a resonable rate, but it's time consuming work. Not everything will be at this detail level, it just becomes impractical. But I have Hi-Res models of everything, and it all needs to be optimized for performance in orbiter. However right now it works very well in 3DS MAX, for making Hi-Res renders like those you see me post.

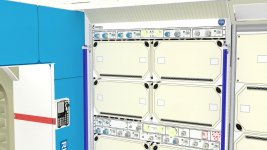
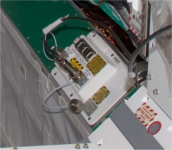
One resource is to use 3D Warehouse and get some of the parts pre-made. Like the cannon plugs I used on the Express racks. It saves time. The cannon plugs, screws, springs, and some of the display flat panels all come from free resources like "Parts Warehouse" I also e-mailed a parts company, and they sent me ACad and 3DS drawings on a CD. I compiled a list of sites that I use here LIST

Thanks for asking.
 
Last edited:
GWS Update

Light fixtures
36", 30", 24". It should be noted that these are not DC fluorescents, but they are DC LED tubes

UOP's Type 1 and Type 2
The raised area of the UOP-2 is prototypical as seen in the source image.

I'm not sure why there is 120 vdc power outlets, but I'll be doing some research and probably putting Cat 5 RJ45 sockets (DATA) on the faceplates, and replacing the 120 VDCs with 12 DVC, and 5 VDC outlets. Seems to me if you start with a voltage closer to the object your trying to power you can remove the brick from the equation. Less bulk to be floating around in the cabin.

Vent panel

The Express label board has been changed for a closer fit with space between the edge and items.
 

Attachments

  • UOP_2.png
    UOP_2.png
    299.6 KB · Views: 38
  • Lights_2.jpg
    Lights_2.jpg
    138.5 KB · Views: 31
HELP!!!

I'm looking intently for a better photo of the DDCU ISPR in the KIBO module, anybody got anything better? This tiny piece of junk doen't reveiel any detail at all. Got it from the NASDA site.
 

Attachments

  • eps_s.jpg
    eps_s.jpg
    10.1 KB · Views: 18
GWS Update

ISIS Drawer
SAMS-II Remote
SAMS-II ICU

the latch could use more detail, but it's not bad.
 

Attachments

  • ISIS_Drawer.jpg
    ISIS_Drawer.jpg
    86 KB · Views: 11
  • SAMS-IIRemote.png
    SAMS-IIRemote.png
    439.1 KB · Views: 12
  • SAMS-II_ICU.png
    SAMS-II_ICU.png
    441.1 KB · Views: 10
GWS Update

Centerline Berthing Camera Assy
Enjoy, and please comment.
 

Attachments

  • CBC_a.png
    CBC_a.png
    153.7 KB · Views: 14
  • CBC_b.png
    CBC_b.png
    91.5 KB · Views: 10
  • CLC.jpg
    CLC.jpg
    87.8 KB · Views: 14
  • RoboConsoleHandbookjsc36406voliib.png
    RoboConsoleHandbookjsc36406voliib.png
    348.5 KB · Views: 18
GWS Update

Glacier to be used as a refrigerator instead of a freezer aboard GWS

This particular render is unfinished, gotta label the controls and cannon plugs
 

Attachments

  • Glacier.png
    Glacier.png
    220.2 KB · Views: 14
GWS Update

Lets see if anyone is paying attention.

Double 1g bunk ISPR.

The dimensions have been altered to create the maximum space availability for each bunk space. So instead of rotating the set out to get behind it, you have to pull it strait out. Because its a double ISPR it will not fit through a CBM Hatch. Repairs will have to be made directly in the module they were installed in. Obviously these need to be installed before an endcap is directly mounted to the module tube.

Note the ISIS drawers, these have hinges along the long side to permit opening from top and bottom of the ISPR frame.

Regular pillows, memory foam mattresses, blankets, Velcro patches, and the compartment has a blackout curtain, and ventilation.

Although not shown is the Caution and Warning and Personal entertainment center imbedded in the ceiling of each bunk.

So there's still some work to do on these.

PS. Female astronaut not included.
 

Attachments

  • Bunk_1.jpg
    Bunk_1.jpg
    114.5 KB · Views: 34
I'm still paying attention, and just now I went back through the thread to figure out whether or not there's a centrifuge on Gateway. There is, and these beds and the freezers plus this 1g zone make for one habitable station. What's the RPM of the wheel, anyway?
 
I'm still paying attention, and just now I went back through the thread to figure out whether or not there's a centrifuge on Gateway. There is, and these beds and the freezers plus this 1g zone make for one habitable station. What's the RPM of the wheel, anyway?

Can't say for sure: Looks like about 6 RPM, but that seems a bit fast to me.

A. I don't know the formula to figure it out
B. I don't know if the Graviton Module could withstand the test of high speed rotation
C. Can't say if the weight of the HAB segment will be a critical influence
D. While I tried to balance everything in the modules, I'm sure there will need to be some kind of weights and balances practices for the astronauts to use to prevent an out-of-balance state while creating gravity.
 

Attachments

  • Rotation_Calcs_1.png
    Rotation_Calcs_1.png
    65.6 KB · Views: 35
Last edited:
Been sick the last two weeks, Bronchitis and an Ear infection. Been to dizzy from the drugs to do any real work. I did however get my Masters Degree confirmation, the diploma will be in the mail, delivery expected in 6-8 weeks. At least school is out for a while, and no pressure to start again soon. No raise at work, but at least they did pay for the degree. $11,000.00 USD for 36 credit hours of course work. I'll save for a while and take the 3DS Max course I've been too broke to enroll in. $2300.00 USD for 1 class and 3 credits. We shall see if it's worth it.
 
Bought the SLS Blk II from Turbo Squid this week, this should mature a good portion of the tank conversions and workshops, now I have to modify them for use on GWS. The airlocks and nodes will shift from previous locations to accommodate the longer core stage but the count does not change. This should be an interesting few months getting used to the UI again. Got a line in on NSF for the latest OMLs just waiting on a reply from Chris.

I also downloaded Autodesk 3DS Max 16 yesterday, I hope my ageing i7 can handle it. They say they have improved performance again, but I doubt it. If any one knows for sure let me know.

I may abandon(temporally) the high res versions to move the project along, but that means reducing the poly count and optimizing all the objects to a reasonable frame rate for assembly. still only getting about .3 FPS on tri SLI NVS 3500's. More to come...
 
I caught a "Crypto" Trojan on the 14th, just got back up and running enough to make a few things work. I LOST EVERYTHING on three major drives. Lucky for me I had run a bare minimum backup, and all my meshes are old enough that a 6 month old backup of that also survived, however the tedium goes on trying to restore all the data, discover just what recent stuff I lost and go fetch what I can.

If you ever get one of these, turn it off immediately, setup a different HD and start from scratch, Malware Bytes will clean what it can, but you will lose a lot. Don't pay the ransom. Best advice, backup, backup, backup NOW!!! Use DVDs, BDEs CDs but do it NOW!!!

The two items in the previous post were also lost, but hey I can go get them again. I'm still on the job search, and have interviews coming up next week. Hang in there a little longer, I really am trying to restart this project. From now on it will be done off line in a isolated network, all research done on a sacrificial laptop.

PS the house is coming along slowly, lack of funds takes it's toll.
 
Back
Top